Easy Stage - using music sheets on stage

Deutsch - English
I'm using my IPAD to show leadsheets as PDF- or PNG-files.
On stage I do not want to worry about instruction sheets of the app I am using, but I only want to make good music.
On the other hand the sets you play may differ from gig to gig. It should be easy to arrange sets without being forced to store the files several times.

To meet these requirements the app is divided in two parts:

Part 1: On stage
On stage you wipe left with your finger to get the next file or you wipe up and down to leaf through the sheets of one file. You can use a bluetooth footpedal too.
If you have no sets, you can go back to the list of files by tapping on a little button in the upper left-hand corner. Select the next file from the "All"-list.

On stage it may happen that you count in too fast because you are too excited.
To avoid this you can add the velocity of each song in beats per minute to the song in question. A little metronome, which blinks in the upper right-hand corner of the music sheet, will help you.

Part 2: At home
When you organize your sheets and sets for the next gig, the files (PDF, PNG, DOC, ...) are created by your favourite music program, a word processor or a scanner. You have to store these files in a new folder on Dropbox. PDF- or PNG-format should always be possible.
PLEASE NOTE: This app uses a Dropbox account. This is a precondition! You do not need any internet connection on stage. Everything works offline.
The advantage of Dropbox is that you do not have any trouble to transfer your data from Mac or PC to Easy Stage.

Tap on Button left and on the next screen tap on oben rechts in the upper right-hand corner. Then you will see a page where you can 
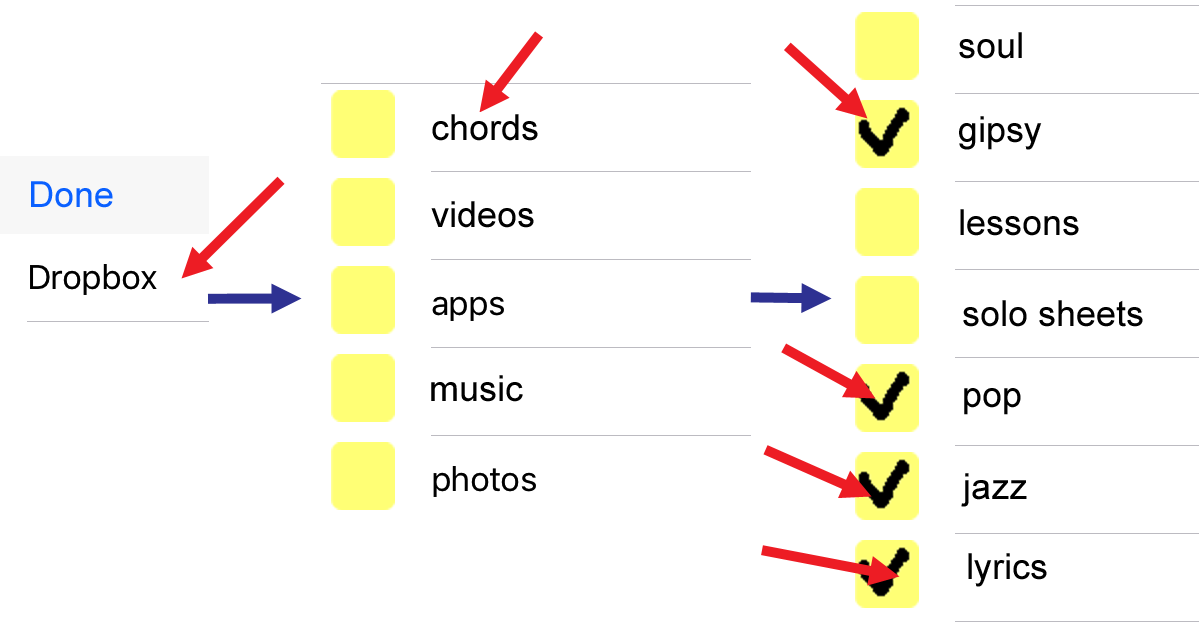
select the folders on dropbox which are to be synchronized. At the first start of Easy Stage this page will be shown automatically.
You can leaf through the Dropbox directories and select a folder by tapping on the yellow box. All subfolders will be selected automatically.
Screenshot

If you tap on "Done", the app begins to synchronize the selected folders. The process is shown by a spinning wheel on the tab bar at the bottom. On this tab bar you can select Wlan/Mobil whether the synchronization should only use wifi or mobile data too. You can find all downloaded files in the "All"-folder in the column on the left. In the column on the right and later on in the folder "Sets" in the column on the left you can find your sets. If you want to create a new set list for your next gig at Carnegie Hall, tap first on + at the bottom and add "Carnegie Hall". If you want to play three sets, tap on "Carnegie Hall" and add Set1, Set2 and Set3 by tapping on + . Now tap on Set1.
Select the first song in the "All"-folder and keep pressing on the song. Then drag the song to the right column. Repeat this with any other song.

Screenshot
The songs can be renamed and deleted by tapping on the song and then on Edit . If you want to delete a song, now tap on minus, if you want to rename a song, tap on its name. You can change the order of the songs by dragging them up and down. This is how you can create sets for each gig. These sets will be shown in the left column too and can be the basis of new sets.

In the text field at the bottom you can add the velocity in beats per minute. In the "All"-folder this is a basic definition that will automatically be applied to the song being dragged into any set. If you do so in a set, the velocity is only applied to the song in the concering set. On stage there is a metronome blinking, which is only visible if you have defined the velocity of the concerning song.

In case you need to digitalize a fixed arrangement or some scores on paper,  take a Kamera 
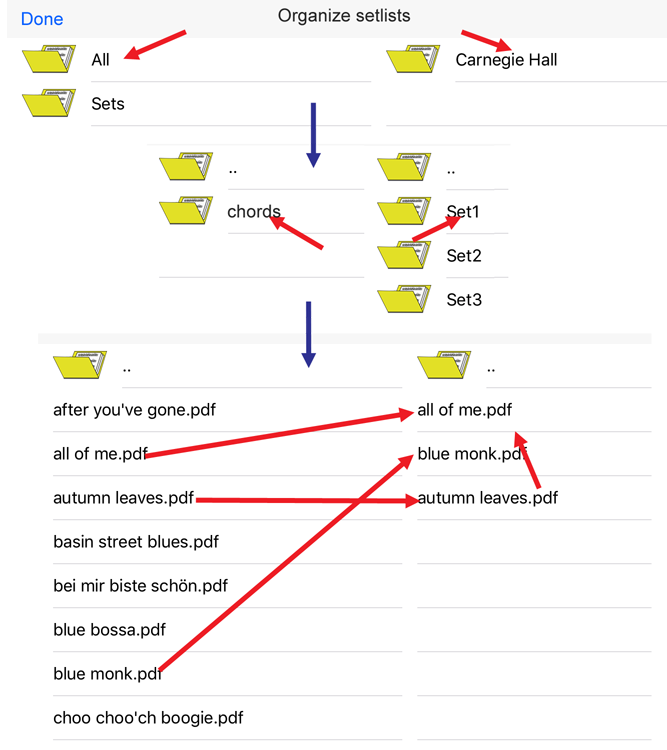
photo and place it in a subfolder of the "All"-folder. As soon as you are online the photo will be uploaded to Dropbox.
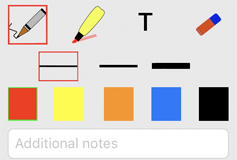
If you tap on "Done", the changes will be saved and you see the start page that will be used on stage. Test it! Is everything working?


In-app purchases

Select Information about in-app purchases. A window will open, where additional features can be purchased. Use these features in the following way:

In the window, where you organize your set lists, you can select a file in the left table. The file will be shown, as known from stage mode, including a little additional tool window .
If there is nothing selected in the first row, you can navigate in and scroll your sheets.
There is a pencil to write and a marker to highlight text which can be used with your finger or Apple pencil. The width of your pencil or marker can be selected in the second row. If you select T, a textfield will be shown in the second row. You need to tap with your finger or Apple pencil on the position where you want to place your text. Write your text by using the virtual keyboard and press the return button. You can move your text with your finger or Apple pencil. By means of the buttons on the left and the right, you can change the font size. The colour can be chosen in the third row.
Delete single notes by using the rubber.
You can use the textfield of the last row to add some text to the piece of music you are working on. This text could for example be the key of the song. As described later on, it will be shown in the spreadsheet of your set.
Basically: Your notes will be copied by drag and drop from the left to the right table. They can be changed afterwards for this special set. That is how to take different notes for the same sheet in different sets.

Select a set list from the right table and select Edit. Tap now on and share this set list with other musicians as spreadsheet.

If you own more than one Apple device e.g. an IPad and IPhone, you can export your set lists from one device to the other one. A folder will be created on Dropbox. Share this folder and other folders of your sheets of music with other users of Easy Stage. If you use the same structure and labelling for your Dropbox folders, your set lists will be synchronized.

Other programs by Detlef Hoche

site notice
privacy policy
contact